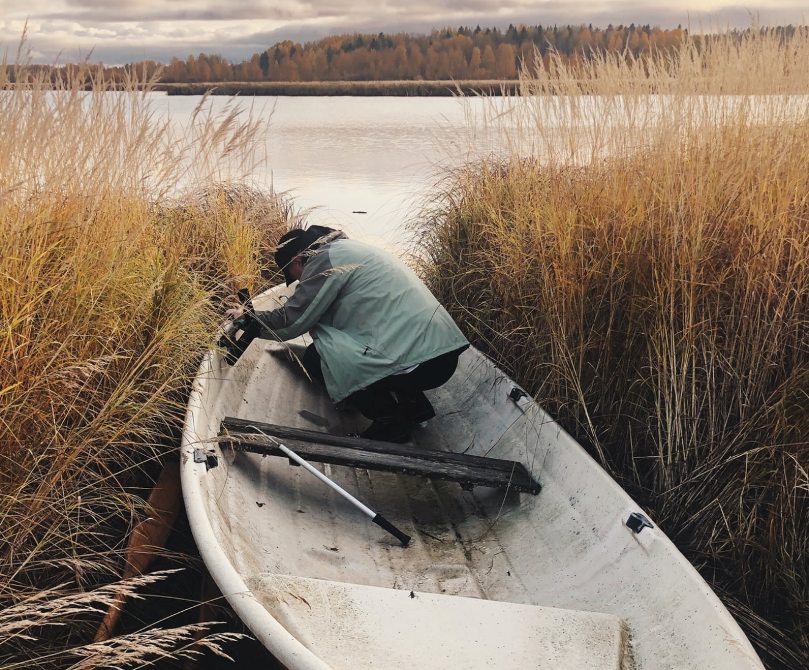
Fiberglass composite boat is incredibly popular, more so than many others. One of the major reasons behind this choice is the fact that damages are fairly easy to repair. Even amateurs can make simple repairs to damaged fiberglass.
There are two major reasons why fiberglass can become damaged. The first is down to minor design flaws or inadequacies during the construction phase. The second is because the FRP (fiber-reinforced plastic) has sustained damage from a heavy collision. Fiberglass boat damage may seem disastrous but repairs are fairly easy to do – with the right materials.
Sourcing Materials needed to Repair Fiberglass composite boat
While you’d try to match up the fiberglass with the original materials it was created with, it’s sometimes impossible. It’s not always possible to match the materials as some may be unavailable and very costly. Fortunately, there are still plenty of ways to safely repair fiberglass with some suitable substitutes.
Resin for Minor Emergency Repairs
Epoxy, isophthalic polyester, and vinyl ester are popular repair options and often preferred for fiber-reinforced plastic repairs. Generally, epoxy resin is the more popular option for minor emergency composite boat repairs as they tend to have a longer shelf life. Also, it’s far more adhesive so makes it an ideal choice.
Original Glass Reinforcement
Using the original fiberglass materials to repair the damage would be ideal, if possible. Unfortunately, if it isn’t, an alternative or substitute that’s similar to the original fiberglass would be useful. Shallow repairs may suit lighter glass reinforcement materials as they come with thinner layers rather than thicker layers. Of course, sourcing original materials may be more difficult but it’s still worth looking into, nonetheless.
Repair Steps
No two composite fiberglass repair jobs are the same. Every type of repair is unique, even though the same general procedures or steps are used. Generally, these steps are taken to carry out successful repairs with composite boat.
- You must find out the extent of the damage.
- You must plan what specific repairs are to be completed and by which materials.
- You must complete the repairs. You can opt for the DIY approach or hire a professional to do the work.
Dealing With Laminates Contaminated By Salt-Water
Fiberglass contaminated with salt-water needs to be cleaned with fresh-water. It needs a thorough wash so that the salt-water can be fully removed from the laminate. You need to let the laminate dry for at least forty-eight hours; fortunately, you can make the process easier with hairdryers, heat lamps, and even a hot air gun. Fans can circulate air freely in enclosed spaces and may be useful for this situation as well. However, moisture levels should be less than 0.5% in weight so that repairs can be carried out.
The laminate that’s damaged needs to be replaced. Minor damage is far easier to deal with than extensive damage, but every situation is unique. You could use acetone to wipe down the surface but needs sufficient time to evaporate on the resin, possibly up to five minutes. Fortunately, if the water contamination is fairly minor, you may only need to infuse new resin without having to replace the laminate skin. Again, it’ll depend on the extent of the damage.
Removing Damaged Laminate
If there’s damaged laminate, it will need to be removed and that will mean surface preparation is required. You could grind the damaged laminate away; however, if you are to do this, you need to ensure you can safely disperse the fiberglass dust. What you might not be aware of is that fiberglass dust can be very abrasive and could damage equipment if it isn’t removed immediately. It’s essential to have a suitable way to dispose of the excess fiberglass dust.
You need to determine which areas have been damaged and mark them. Then, you’ll be able to remove those parts and be left with a strong structure. If there is further damage to the FRP, a 16-40 grit disk grinder may be required. Unfortunately, if there is extensive damage, grinding may not be the best solution and an alternative avenue needs to be explored. You could use a circular saw to cut into the laminate and remove the damaged FRP.
Undercutting the damaged laminate and removing it with a chisel (preferably a wide blade air or wooden chisel) would be best. However, the removal method will be determined by the extent of the FRP damage.
The Lay-Up Process
Lay-up is a popular repair process that is often required with FRP damage. There are two ways in which the process can be used. The first is to lay-up ply on the tapered scarf joints and each ply is slightly bigger than the last. Each ply can be bigger than necessary as can be cut to size later; however, don’t use ply that’s too small. You might end up with resin pockets at the bone lines which weaken the joints.
The second method is to lay-out each ply-board parallel to the scarf; however, this process requires more work to blend the new ply with the laminate successfully. Of course, it all depends on what you feel you’re able to handle efficiently as possible. Opting for large ply during the early stages of the lay-up process can help create a bond for heavier repairs.
How to Use the Lay-Up Process?
Making repairs to composite structures – such as boats – needs to be done carefully but precisely. The wet lay-up process is fairly simple and this involves applying resin onto the FRP and attaching the fiberglass to the resin. This reduces the possibility of trapping air between the ply boards as air bubbles can become a problem when the resin is applied to dry fiberglass. You can build the thickness until the right consistency is established. You may want to saturate of fiberglass and attach the glass to the resin’s surface. This is useful when dealing with overhead or inclined surfaces.
The second method of lay-up process
There is also a second method to consider with the lay-up process. This method involves rolling up the reinforcement materials onto a cardboard tube. You need to wet the area that requires repairs then carefully roll out over the resin wet area. This, however, requires two people to complete it successfully as you need to avoid dropping the edges.
Start with the first ply materials and this should be CSM (chopped strand mat). When it comes to tapered scarf joints, you want to ensure the mat covers the entire surface. If this is done effectively, a new bond between the new and existing laminate should be created. However, you have to be careful to avoid cooking the resin by applying one too many layers on the laminate. This tends to occur when repairing a larger area and there’s a risk of the resin becoming too brittle to be useable. There is also the problem of shrinkage, again, because of too many layers being laminated.
It may be advisable to keep to a thickness no more than 6mm to avoid shrinkage or cooking the resin.
Inspect the Quality of the Laminate After the Repairs Have Been Carried Out
Once the initial repairs have been carried out, you should inspect the FRP laminate. The following are a few things you do not want to find during your inspection:
- Pits, Cracks, and Voids
- Contaminates Within the Laminate
- Discoloration of the Resin
- White Laminate Showing Dry Reinforcement
- Wrinkles In the Laminate
Ideally, you want to see a nice smooth finish to the repairs so they work with the contours of the laminate surface.
Dealing With Major Sandwich Construction Damage
Some composite damage can’t always be seen by the naked eye and may go far below the surface. Removing or de-bonding the laminate may cause further issues to be found but it’s difficult to do without professional input. It may require cutting back a large area, starting from the outer to the inner skin. Repairing skins is fairly easy to do – with the right skills – and will create a thinner thickness layer on the laminate.
Making these repairs must be done with extreme care as the skins must be bonded efficiently to the core board. You don’t want to see any gaps forming between the core and skins.
How to Repair De-Bonded Laminate Cores
If the core of the laminate has come loose from the original skin, it may result in larger, more expensive repairs. What’s more, the new structure may not be as strong as the original one so that’s something to take into consideration. Repairing de-bonded laminate cores require some care and a lot of patients. So, carefully drill pilot holes in the area you think have become de-bonded. The root cause might be down to the fact the skins weren’t correctly bonded to the core.
Dealing with Small Holes
Sometimes, laminate can have non-penetrating holes; fortunately, if they haven’t compromised the integrity of the structure, they can be repaired. Putty, also referred to as ‘structural putty’, can be used to deal with the non-penetrating holes; and usually, is made up of fillers and resin combined. However, there are lots of different types of fillers, putties, and pastes to choose from for making marine craft repairs.
Unfortunately, epoxy putty that requires a gel coat, mightn’t be the best solution as they don’t bond well together. As a result, other putties or fillers may work better for these repairs. A die grinder or a sanding sleeve might be useful for dealing with small gouges or scratches. If you use a grinder or sanding sleeve, it’ll create a V-groove; you will need to feather the V edges with the 100-grit disk so the surface is ready to be bonded. As always, any paint from the edges should be removed with a 60-grit disk; however, you don’t want to grind the gel coat off.
You may want to consider using the following process.
- The entire surface should be cleaned with acetone. This will remove any grime, dirt, and wax left on the composite.
- Next, take a putty knife and remove any materials that are damaged. Again, acetone can be used to cleanse the area thoroughly.
- You want to create the putty mixture. It’s important to follow the instructions with your chosen putty filler.
- You now need to apply the putty. Ideally, you want a putty thickness of around 1/16 inches.
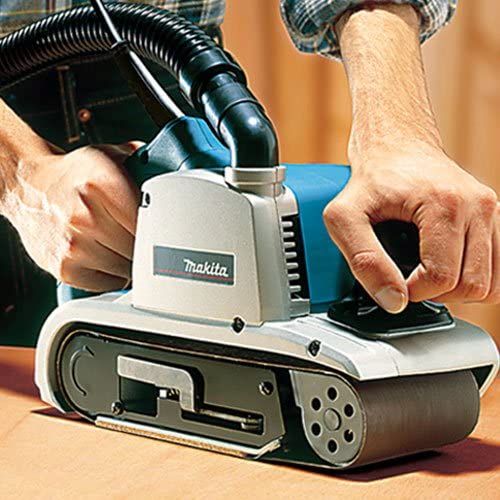
- If you want to use a gel coat mix, you need to apply cellophane over the gel coat and, with a razor’s edge, spread the mixture out. Once the mixture has dried (it should take 30-minutes to do so), you can sand the surface with the best belt sanders. You can also paint when finished.
Dealing With Damage to the Structure
Once you have removed the damaged laminate, you’ll need to mark the scarf zone. Choose an appropriate method and grind the scarf perimeter with a laminate thickness of 12:1. Select a 16-40 grit disk and cut the scarf. You will need to smooth the surface out with a grinder and that includes rounding the corners.
Final Thoughts
Dealing with fiberglass laminate repairs can be both simple and complicated, depending on the extent of the damage. Fully finishing the repairs may require a professional to ensure the finish is up to a high standard. However, minor repairs and knowing how to deal with them is necessary for composite boat owners and fortunately, many repairs can be handled without the need of a professional. Of course, it all depends on the underlying cause and damage. Why not read more at: https://www.stoneycreekwoodworks.com/.